
Table of Contents
As AI and AR technologies continue to evolve rapidly, smart glasses are moving beyond the world of early adopters and becoming part of everyday life. However, with so many different products on the market—including audio glasses, AI-powered camera glasses, and AR glasses with built-in displays—many consumers and first-time users have the same question: How are smart glasses charged?
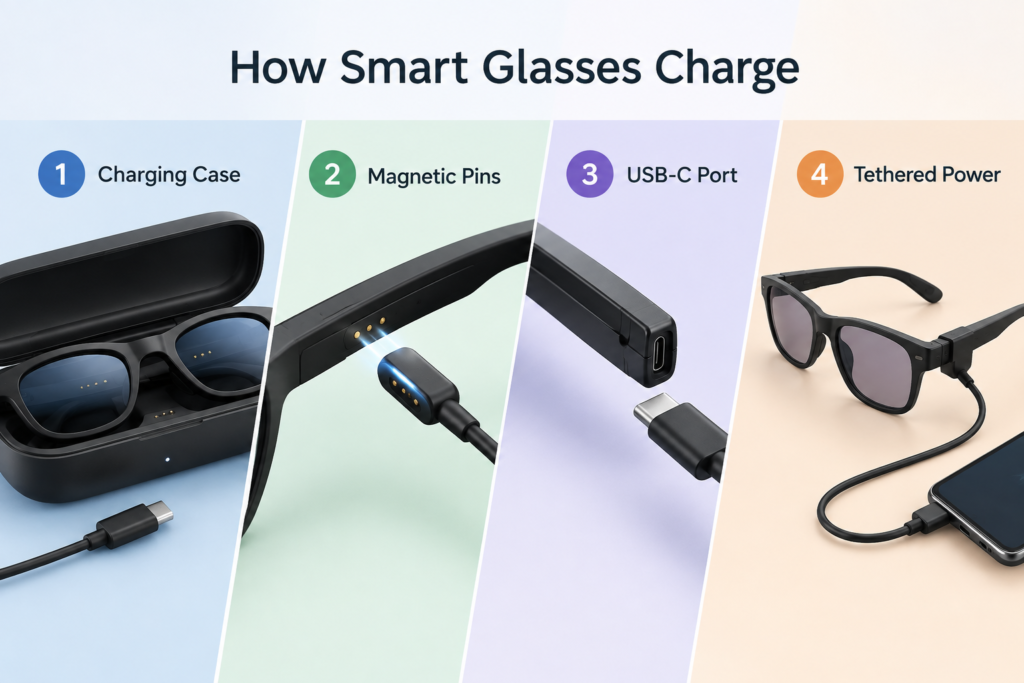
This guide compares the major charging methods currently used in smart glasses and provides practical information on charging procedures, power requirements, expected battery life, and common troubleshooting issues.
Four Main Charging Methods for Smart Glasses
Depending on their core functions—such as audio playback, photography, AI interaction, or AR display—and their structural design, smart glasses generally use one of four major charging or power-delivery methods:
                        ┌── 1. Portable Charging Case ── Ray-Ban Meta, Echo Frames
                        │
                        ├── 2. Magnetic Charging Pins ── Lucyd, Solos
Smart Glasses Power ────┼─
                        ├── 3. Direct USB-C Charging ── Some modular smart glasses
                        │
                        └── 4. Tethered Power / DP ──── XREAL, Rokid, RayNeo
1. Portable Charging Case
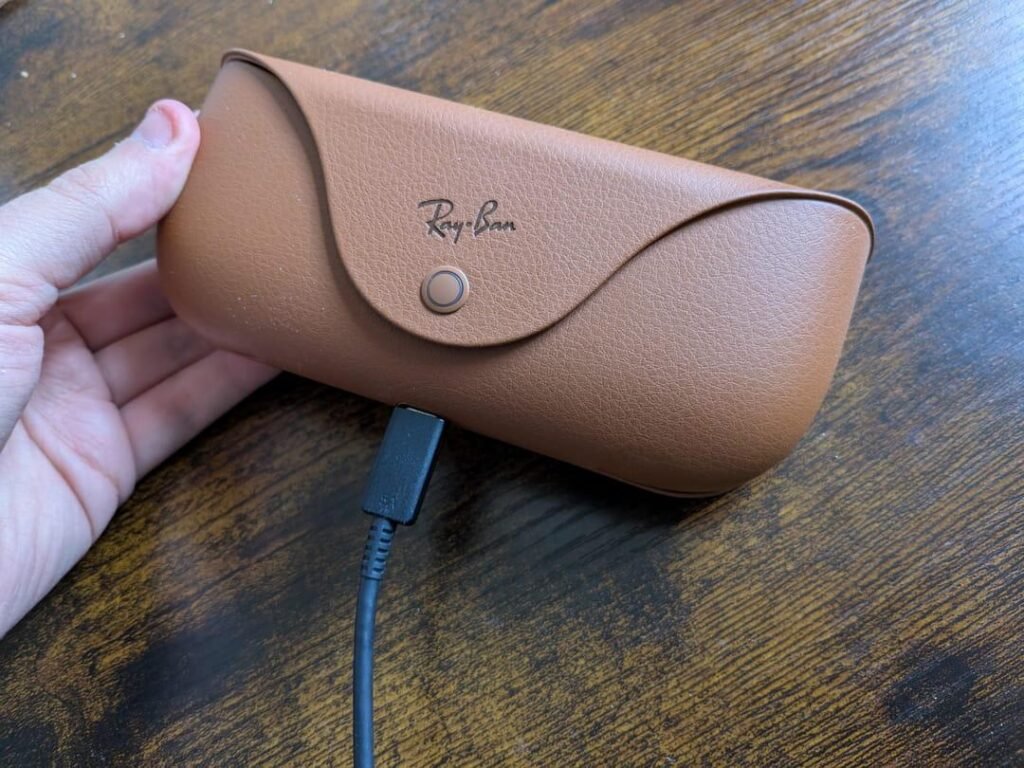
- How it works: This is one of the most common charging solutions for consumer AI camera glasses and premium audio glasses. Instead of having an exposed charging port, the glasses use small metal contacts, such as Pogo Pins, positioned around the nose bridge, hinge, or end of the temples. When the glasses are placed inside the dedicated charging case, these contacts align with the spring-loaded pins inside the case. The charging case contains its own larger lithium battery and can be recharged through an external USB-C port.
- Advantages: It enables a convenient “store and charge” experience. The case protects the glasses while also helping extend their total usable time between wall or USB charging sessions.
- Disadvantages: Users need to carry the charging case when traveling. If the case is lost or damaged, the glasses may not be able to receive power directly.
- Examples: Ray-Ban Meta series, Amazon Echo Frames, Even Realities G1, and similar products.
2. Magnetic Charging Pins
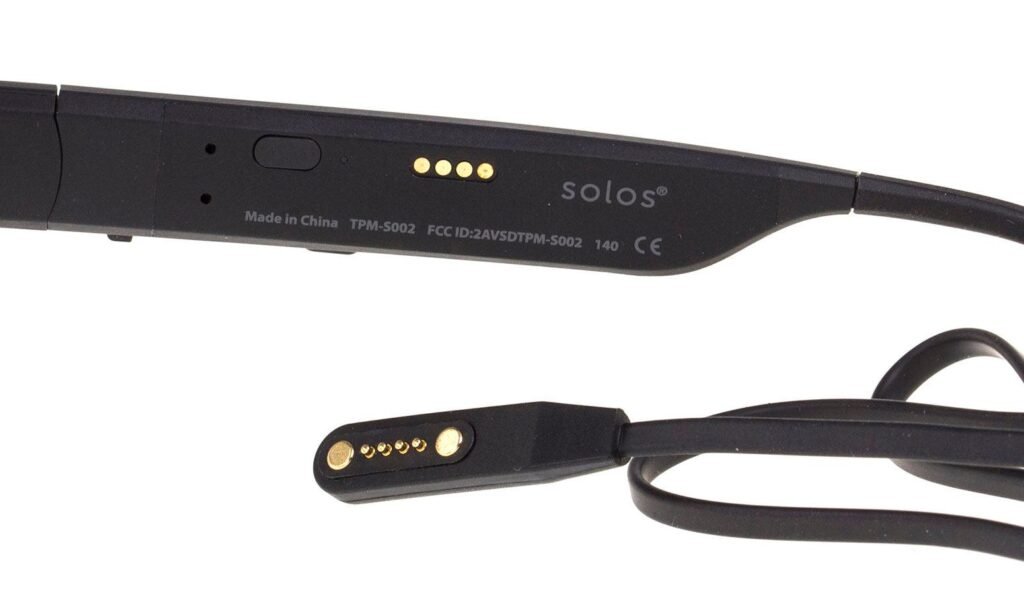
- How it works: Manufacturers place dedicated metal charging contacts on the inner or lower side of the temples. A special charging cable usually has a standard USB-A or USB-C connector on one end and one or two magnetic charging connectors on the other. When the connector is brought close to the charging contacts, the magnets help automatically align and attach the connector.
- Advantages: There is no need to carry a relatively bulky charging case, allowing the glasses themselves to remain lighter and thinner. Magnetic connections can also reduce mechanical wear on traditional charging ports and can make it easier to design around dust and water-resistance requirements.
- Disadvantages: Magnetic charging cables are often proprietary and are generally not interchangeable with standard phone charging cables. If the cable is forgotten or damaged while traveling, finding a compatible replacement can be difficult.
- Examples: Lucyd SoundGlass, Solos Smart Glasses, and some other audio smart glasses.
3. Direct USB-C Charging
- How it works: Some manufacturers place a standard USB-C port at the end of the temple, behind the ear, or on a detachable battery module. Users can charge the glasses by connecting a standard USB-C cable, much like charging a smartphone.
- Advantages: USB-C offers excellent compatibility and eliminates the need for a dedicated charging cable.
- Disadvantages: Adding a physical port can affect the appearance and structure of the glasses. It also creates additional engineering challenges when manufacturers need to maintain a high level of dust and water resistance.
- Examples: Some modular smart glasses with replaceable temples and certain industrial AR glasses.
4. Tethered Power / DisplayPort Power
- How it works: Strictly speaking, this is not traditional battery charging but rather real-time power delivery. Some AR glasses designed primarily for viewing content have relatively high power requirements. To reduce the weight of the glasses, certain products may minimize or eliminate the need for an internal battery. Instead, they connect to a smartphone, computer, gaming device, or dedicated computing unit through a high-bandwidth USB-C cable that can carry both power and video signals.
- Advantages: The glasses can be significantly lighter without a large internal battery, while battery aging and battery-related heat inside the glasses can also be reduced.
- Disadvantages: Users must deal with a physical cable during use, and the connected phone or computing device may drain its own battery more quickly.
- Examples: XREAL Air series, Rokid Max series, and some display-focused products from RayNeo.
Step-by-Step Charging Guide: Charging Cases and Magnetic Cables
To charge smart glasses safely and maintain battery performance, users should follow the manufacturer’s charging instructions. For the two common charging methods—charging cases and magnetic charging cables—the following steps provide a general reference.
Method A: Charging with a Portable Charging Case
- Check and clean the contacts: Before using the device, remove any protective film covering the charging contacts or the charging area inside the case. Make sure the contacts are free from dust, oil, and sweat.
- Place the glasses correctly: Fold the temples in the correct direction and place the glasses securely inside the case. Make sure the charging contacts on the glasses align properly with the metal Pogo Pins inside the case.
- Check the indicator: After the glasses are placed in the case, an LED indicator on the case will normally show the charging status. Depending on the product, a red or orange light may indicate that charging is in progress.
- Recharge the case: When the charging case itself is running low, connect a USB-C charging cable to the case and a suitable power adapter. Some charging cases can charge both the case and the glasses at the same time.
Method B: Charging with Magnetic Charging Pins
- Open the temples: Extend both temples to expose the charging contacts located on the inner or lower side.
- Attach the magnetic connector: Bring the dedicated magnetic charging connector close to the charging contacts. If the orientation is correct, the connector should align and attach automatically. If it repels instead, check the connector orientation rather than forcing it into place.
- Connect to a power source: Plug the USB end of the charging cable into a computer, power bank, or compatible power adapter.
- Check the charging status: Look at the LED indicator on the glasses or charging connector. The exact indicator behavior varies by product, but a light may indicate charging while a different color or an extinguished LED may indicate a full charge.
Choosing a Charger and Cable: Don’t Worry Too Much About High-Speed Charging
Many smartphone users are accustomed to 60W, 80W, or even 120W fast charging. This naturally raises another question: Can you use a high-power GaN charger to charge smart glasses?
- Smart glasses generally require relatively low charging power: Because smart glasses have very limited internal space, their batteries are much smaller than smartphone batteries. They typically do not require the same high charging power as smartphones. The actual charging power, however, depends on the specific product and its charging circuit.
- Charger compatibility matters: Smart glasses and their charging cases normally include charging-control and battery-protection circuits. A compatible power adapter should provide the voltage and current required by the device. However, some proprietary fast-charging systems may behave differently depending on their supported protocols.
- Recommended power sources: When in doubt, use the charger and cable recommended by the manufacturer. A standard USB power source or a compatible 5V adapter may be sufficient for many low-power smart glasses.
- Pay attention to the cable: USB-C cables used to charge a charging case are generally easier to replace, but proprietary magnetic charging cables are different. Avoid forcing incompatible magnetic connectors onto the charging contacts, as incorrect connections may damage the charging contacts or internal electronics.
Smart Glasses Charging Experience Also Depends on Battery Design
Charging methods and chargers are only part of the equation. The actual user experience of smart glasses also depends heavily on the design of the smart glasses battery.
The space inside a temple is extremely limited. The battery needs to provide enough capacity while remaining thin, lightweight, and compatible with the available internal structure.
For AI glasses, smart glasses, and other wearable devices, battery design involves balancing several factors, including size, capacity, weight, discharge performance, thermal behavior, and safety.
This becomes especially important when a product uses long, narrow, curved, or otherwise irregular temple structures. A conventional rectangular battery may leave unused space inside the device. As a result, some smart glasses manufacturers turn to custom-shaped or custom-sized LiPo batteries to make better use of the available volume.
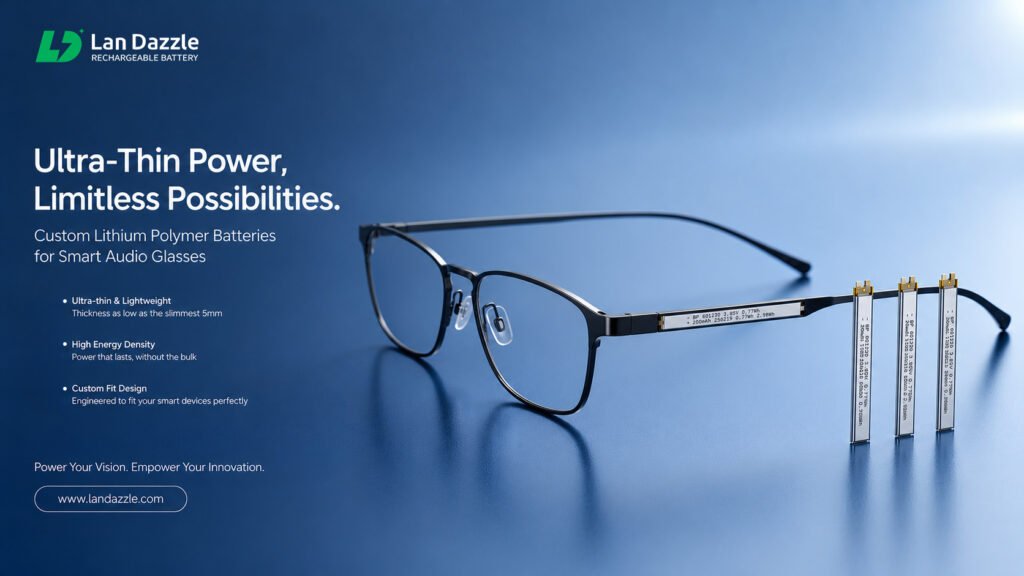
For example, LanDazzle develops custom battery solutions for wearable devices based on the available internal space. Battery dimensions, including length, width, thickness, and shape, can be designed around the product’s mechanical requirements.
For smart glasses, where both weight and internal space are highly constrained, the battery should not simply be treated as a component that is added at the end of the design process. Battery dimensions and performance requirements are often better considered during the early stages of product development.
Smart Glasses Battery Life and Charging Expectations
Smart glasses battery life should not be evaluated in exactly the same way as smartphone battery life. It is useful to distinguish between continuous runtime from the glasses themselves and total runtime when a charging case is included.
| Factor | Audio Smart Glasses | AI Camera / Interactive Glasses | Consumer AR Display Glasses |
|---|---|---|---|
| Typical continuous runtime | 6–11 hours depending on usage | 3–5 hours depending on camera and AI usage | No internal battery in some products, or around 1.5–2 hours for some battery-powered designs |
| Typical charging time | Around 45–60 minutes | Around 40–75 minutes | Varies by product |
| Charging case charging time | Around 1.5–2 hours | Around 2–2.5 hours | Around 2 hours where applicable |
| Total runtime with charging case | Around 24–36 hours | Around 18–32 hours | Usually not applicable to tethered designs |
Actual battery life and charging time vary significantly between products and usage scenarios. Factors such as audio volume, camera use, AI processing, wireless connectivity, display brightness, ambient temperature, and battery capacity can all affect runtime.
- Quick top-up capability: Some charging-case designs can provide a short emergency recharge when the glasses are placed back into the case. The actual amount of additional runtime depends on the product’s battery capacity and charging system.
Common Smart Glasses Charging Problems and Troubleshooting
If your smart glasses will not charge or the charging indicator does not respond, there is no need to immediately assume that the battery has failed. Several common issues can be checked first.
1. Dirty or Oxidized Charging Contacts
Smart glasses are worn directly on the face and head. Sweat, skin oils, and dust can accumulate around the metal charging contacts on the temples, nose bridge, charging case, or charging cable.
- Solution: Use a clean, lint-free cloth or suitable cleaning swab to gently clean the charging contacts. If the manufacturer permits the use of isopropyl alcohol for cleaning, make sure the contacts are completely dry before reconnecting the charger.
2. Magnetic Connector or Hinge Alignment
When using a magnetic charging cable or charging case, the contacts may not connect properly if the temples are not positioned correctly.
- Solution: Check whether the hinges are properly positioned and make sure the charging contacts are correctly aligned. Do not apply excessive force to the magnetic connector.
3. Temperature Protection
Lithium batteries are sensitive to extreme temperatures. If smart glasses are exposed to very high or very low temperatures, the battery management system may temporarily limit or stop charging to protect the battery.
- Solution: Move the glasses and charger to a moderate room-temperature environment and allow the device to return to a suitable temperature before charging again.
4. Deep Discharge
If smart glasses are left unused for a long period after reaching a very low state of charge, the battery protection system may prevent normal charging from starting immediately.
- Solution: Connect the glasses to the recommended charger or place them in the charging case and allow them to charge for a while. If there is still no response, follow the manufacturer’s troubleshooting instructions or contact customer support.
5. Can You Wear Smart Glasses While Charging?
Most battery-powered consumer smart glasses are not designed to be worn while charging.
There are several reasons for this. First, charging can generate heat, and placing a charging device close to the head may cause discomfort. Second, a charging cable connected to glasses while they are being worn can easily become tangled or pulled.
For safety and user-experience reasons, many products are designed to enter a specific charging state when connected to a power source. However, the exact behavior varies between manufacturers and models, so users should always follow the product’s official instructions.
Conclusion
Smart glasses can use several different charging and power-delivery methods, but the overall direction is toward a more seamless and integrated charging experience.
- If you prioritize convenience and protection, smart glasses with a portable charging case can provide an excellent everyday charging experience.
- If you prioritize a lighter and thinner design without carrying a charging case, magnetic charging pins can offer a practical alternative.
- For everyday maintenance, keeping charging contacts clean, using a compatible charger, and avoiding extreme temperatures while charging can help maintain battery performance.
At the same time, the charging experience is closely connected to the battery itself. As smart glasses become thinner, lighter, and more feature-rich, battery design becomes increasingly important. A battery needs to fit the available space while providing the capacity and electrical performance required by the device.
Need a Custom Battery for Your Smart Glasses?
If you are developing smart glasses and need a battery that fits a limited or irregular internal space, a custom LiPo battery may be worth considering. LanDazzle can help design batteries around your available space, required capacity, thickness, and shape.
Have a smart glasses battery project? Contact us to discuss your requirements.
Email: info@landazzle.com
Whatsapp: +8618938252128